
General Info
ZIRCAR Mold Mix 6 is a refractory-molding compound designed to allow replication of three-dimensional objects in glass and bronze. It comes as a paste, which is applied to a suitably prepared pattern and hardens on drying. Properly prepared molds of Mold Mix 6 will resolve the finest details and possess good strength. However, it remains sufficiently friable to permit easy removal after annealing. Mold Mix 6 is highly resistant to reaction with hot glass and gives the fired work a high quality surface free of-hazing common to investment type molds. Mold Mix 6 may be used for hot casting, kiln casting methods and slumping, all with excellent results. The greatest advantage of Mold Mix 6 is its ease of use and our users guide will show you how to use it most effectively.
ZIRCAR Refractory Composites, Inc., The manufacturer of Luminar Glass Products, supplies advanced materials for hot glass slumping and fusing. No other mold materials are as strong, light, versatile, durable, and easy to use. Our mold making materials are designed to be extremely stable while heated, resist sticking and are in most cases can be re-used for a number of cast or slumped parts. To purchase Mold Mix 6 and other glass art products visit our new Online store at www.luminarglass.com
Our products include Mold Mix 6 which is a high temperature refractory Molding compound designed to allow replication of 3-D objects in glass, Luminar Moldable Sheets, also known as RS-DD, which is a high alumina ceramic laminate sheet which has the ability to become pliable when wetted and regain its original strength when dried. Hot glass will not stick to it making it ideal for slumping molds as well as re-usable non-stick kiln shelf liners.
Properties
Mold Mix 6 is ideal for use up 1550°C (2822°F) and above. It will air dry within 48 hours at room temperature or can be force dried with heat. When dried and fired to temperatures above 300°C (572°F), it is extremely strong and resilient.
Composition
Mold Mix 6 is composed of high strength alumina fibers and alumina powders.
Instructions
Mold Making with Mold Mix 6
By Leslie Rowe-Israelson and Melanie Rowe
Edited by Brooke Hamling
Molds may be made from a wide variety of objects which are known as patterns. A pattern is the original object from which all replicas are made. Patterns may be made from plastic materials such as plasticine or clay, or they may be made of rigid materials like wood or plaster. There are many good books on pattern making and the type you choose to use with Mold Mix 6 is a matter of personal preference. For a pattern to work well with Mold Mix 6, it must have no porosity. This means that patterns of wood or plaster must be sealed, preferably with shellac. Paints will work, but the film thickness of most paints will obscure fine surface detail. Unfired clay is the least successful of all pattern materials as it will leave a residue in the mold. Waxes are excellent for use with Mold Mix 6 as pattern materials and require no special preparation. While anything may be modeled readily in waxes, the lost wax process is their highest usefulness.
Parting Agents
Mold Mix 6 will adhere quite firmly to surfaces that have not been treated with a parting agent. Several common parting agents have been shown to work well. The first an aerosol cooking spray, a parting agent usually used in the kitchen. It must be applied sparingly as it will ruin the mold surface in heavy applications. Others are petroleum jelly in thin application gives good results as will a light coat of dish soap.
A. Mixing
Do not add water or let air get to the mix and keep the container sealed and airtight. Scoop out small amounts of mold material and put in Ziploc containers and Zip bags to minimize drying. Take a hand mixer and whip the mix until all lumps are broken down and the mix consistency mimics a thick cream. You will notice fibers in the mix. These fibers weave a blanket in the mold and add strength. The mix will solidify if it remains uncovered after mixing, but simply stir with a spoon, spatula, or mixer and the mix will regain its creamy consistency. Once again, keep all containers of Mold Mix 6 covered, even when actively applying.
B. Application: Applying Mold Material for “Wax Positive”
Take small container of pre-mixed Mold Mix 6 and paint on in thin layers with a soft supple brush. The finish on wax positive will determine finish on art piece. If the mold material wants to separate do not worry, just keep brushing. Start applying the mix at top and move down project. Place your pattern covered with the first coat in front of a cool fan to dry. This initial layer must be tacky dry before applying the next coat. Think of drying from inside-out. If you try to apply the mix too thick it will want to crack. Do not let the mix build up thick in undercuts of the mold. Try to paint each layer in a different direction to weave a blanket over wax and use the fibers in the mold material.
Keep painting on layers until you are approximately 1/8 to 1/16th inch thick. Any thicker and it may not allow sharp areas to shrink and it may break off small details like arms or fingers. Let the mold dry totally-approximately 3 days. If it is still cool to touch wait an additional day. Small molds may take only 2 days to completely dry.
Applying to Plasticine (no burn-out necessary)
Paint on thin layer of Murphy’s Oil use soft and let dry. Paint on the mix in thin layers and let dry. It will start to curl on the edges but this is OK. If you have no undercuts the mold should be easily removed and you can start using your mold.
C. Burning-Out the Mold
Microcrystaline wax is toxic when heated to burning. Burn out the mold with Tiger Torch wear respirator and take all necessary precautions including fire gloves, eye protection, etc. Burn outside on a day without wind. Get a metal garbage can and have the lid ready to put out any fire if the wax ignites. Fill the garbage can ½ way with water and place a steel rack on top. Then place your mold on top of the steel rack. Light the torch and put the torch on low. Point the torch to the bottom Edge of the mold, waving the flame from the bottom to the top. Keep the torch horizontal at all times. Do not point the torch directly into the can. Let it begin to drip slowly but continue to be cautious of the wax catching on fire. If the wax ignites, stop torching and let the fire drip into the water until it stops burning. Do not rush and do not worry if mold catches fire because it will. If wax leaches through mold material it will burn off during firing.
At this point in the process the mold is very fragile, therefore be extremely cautious. Take the mold and gently put in a kiln and heat up to 1400⁰F to return the mold to white. This material is resistant to thermal shock so heat the mold to this temperature as quickly as the kiln will allow.
D. Release Agents
The recommended release agent for use with Mold Mix 6 is Bullseye Shelf Primer. It provides a wonderful release that will give you a soft stain finish to the glass wherever it touches the mold. Get a sifter and two. Make sure the mold is clean and sanded to a smooth finish. Vacuum the mold carefully and wear a respirator. Get a partner to help, and a large bucket ready to pour shelf primer. Mix 1 part of powder to 5 parts of. Mix well, then sift 5 times getting rid of chunks and foreign particles. Quickly after the last sifting (do not let the shelf primer settle) hold the mold upside down, pour in the mix, and then poor the mix out quickly and evenly. Do not let it settle in the mold and aim to achieve the thinnest coat possible. Speed during this procedure is extremely important if you have any bas relief or fine detail in your mold. Once this has been achieved put the mold back into the kiln and heat to 400℉ to burn off all the excess. You are now ready to use the mold.
E. Loading Mold
Select a container that completely surrounds the mold. Our containment walls of choice are stainless steels tubes and or pots. We have found that steel tubs tend to break down at high temperatures and pits into the mold. Do not load sand without respiratory protection. Use dry 80-grit clean silica sand or olivine sand to fill the space between the containment wall and the mold. We burn out our sand before first use to eliminate any foreign material. Gently cover top of mold to ensure that no sand gets into the mold. Pour sand carefully and slowly into the container. Try to match the container with the shape of the mold so that the sand walls are consistent.
F. Choosing Attached Sprue or Drip Pot
I believe this is your decision as each project comes with its own technical difficulties. You must think ahead while designing your piece. Will the glass flow into every space? Do I lay the pieces sideways, straight up or down? If I use a ceramic drip pot, I will surely capture bubbles as the glass drips down? Do I gently pour frit into my mold? Will I hit fragile points? All of these questions must be addressed before beginning the design.
G. Firing Schedule – A Fine Science
This will depend on your piece. You must carefully plan this part of the process before you begin, but here are an example firing schedule:
Take 10 hours up to 1010⁰F.
Hold 4 hours to heat sink sand.
2 hours up to melting.
Hold no more than 2 ¼ hours (open face molds need only 1 ½, crystal flows faster than Bullseye. Frit must be ½ longer).
If the mold is intricate, with narrow spaces-hold 2 ½ to 3 hours.
Then continue rest of the program.
Download the Mold Mix 6 PDF File
SDS (in PDF format)
Other Information
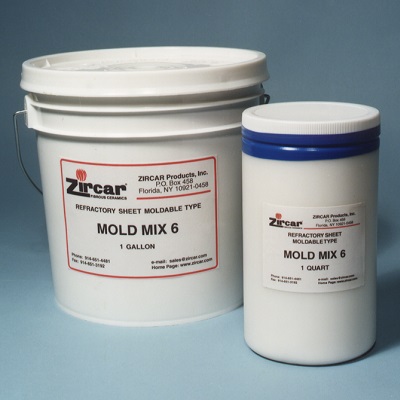
AVAILABILITY
| Item # | Description |
| OS01 | MOLD MIX 6, Package of Four 1QT Bottles |
| OS02 | MOLD MIX 6, 1 Gallon Bucket |
| OS03 | MOLD MIX 6, 5 Gallon Bucket |